
DIY: Potting Station
By Lauren Dunec Hoang, Houzz
Potting stations are garden workhorses. They keep tools within easy reach, provide a spot to store bags of soil and amendments, and offer a work surface for starting seeds, dividing flats and repotting plants. Beyond the messier garden tasks, a potting station is also a convenient spot to arrange a bouquet of flowers, set down a basket of herbs, tomatoes or anything else harvested from the garden, or — at the very least — rest your cup of coffee.
No matter how you choose to use your potting station, we suspect that once you have one, you may wonder how you ever did without this gardening staple.
Theresa Fine, original photo on Houzz
Homeowners Sandy and Jim Gorman built this potting shed on their property in Henniker, New Hampshire. The long table serves as a handy potting station.
Whether you build it yourself, hire a pro, purchase an off-the-shelf model or repurpose a worktable into a potting station, here’s what to consider before getting started.
Project: Set up a potting station
Why: To create an easy-to-access workstation for garden projects
It’s a good project for you if: You’re an avid gardener who can’t wait to take advantage of more space for storing go-to tools, starting seeds, repotting and other projects. Conversely, you may be more hands-off in garden beds but happy to make use of an outdoor prep table for arranging flowers, drying herbs or making outdoor crafts.
How long will it take? This project can be done in a weekend, depending on whether you buy it, build it yourself or hire someone to build it for you.
Cost: The cost varies depending on what you make your potting bench with, ranging from about $100 for the simplest prefab model to well over $1,500 for a custom-made bench using top-notch materials. Conversely, by repurposing furniture you already have, you can skip the expense of purchasing a new potting bench altogether.

Art | Harrison Interiors & Collection, original photo on Houzz
A copper-topped, barrel-vaulted outbuilding serves as a pump house and a potting station in this garden in Birmingham, Michigan.
Before you begin: Think about where you’d like the potting station to be and how you intend to use it when planning your design. Do you want it to be indoors or out? Does an area by the side of the house or a corner of the garage need to be cleared to accommodate the potting station? Can you add it to the back of a shed or a pump house for the pool?
Ideally, choose a spot that’s close to garden beds and comfortable to work in (somewhere at least partially shaded and out of the elements). In cold-winter and wet climates, the best spot for your potting station will most likely be under an overhang, in a shed or in the garage.
If you’re planning to add an outdoor sink, you’ll also need to consider where you can easily hook up to a water supply and where the sink will drain.
Related: Hook Up a Utility Sink to a Water Line to Wash Your Crops
Potting station components: Many potting stations have a three-tier system — a top shelf for storing tools, a main work surface, and a lower shelf for stashing pots and bags of soil and amendments. Beyond that, there is plenty of opportunity to customize it to best suit your gardening needs. Consider adding an outdoor sink, drawers to store additional tools and supplies, built-in bins to hold potting soil, or a shade structure to cover the entire setup.

Visionscapes NW Landscape Design, original photo on Houzz
4 Strategies for Setting Up a Potting Station
Don’t want to tackle building a potting station on your own? Don’t worry, there are ready-made potting bench options to suit every budget, and professionals to hire to build one custom to your needs.
1. Buy one already made. Potting benches can be purchased from home improvement stores and online retailers for about $100 for the simplest setups; $250 for standard potting benches with a basic work surface, top shelf and bottom shelf; or upward of $500 for those made of cedar, teak and other choice building materials.
Pros: Ready-made benches are ready to go with minimal installation. Models are available to suit many budget levels.
Cons: There is minimal opportunity to customize. Many of the less expensive models are made from poor-quality wood that will degrade outdoors.
Landscape designer Patricia Acheff of Visionscapes NW Landscape Design in Portland, Oregon, bought the potting station in this photo that serves as the go-to spot for warm-season tool storage. “I use my potting station for keeping my hand tools in one place, along with watering cans, sprinkler heads, watering wands, hose fittings, et cetera,” she says. “I do, however, bring tools indoors during the winter.” The potting station features a three-tier system, with a top shelf for small potted plants and tools, a main workstation with a side shelf for additional storage, and a lower shelf for storing larger items.
Meg Padgett, original photo on Houzz
2. Build it yourself. If you’re experienced with woodworking, constructing a simple potting bench can be a project for a weekend. While you’re at it, try to invest in rot-resistant lumber. “Good exterior cedar and redwood are best,” says San Diego-based contractor Dagan Koffler of Dagan Design & Construction. These woods and a weather-resistant finishing treatment will help prolong the life of your potting bench outdoors. The cost of building supplies can range from $250 to $500 for new lumber, or much less if you can reuse older redwood or cedar boards.
Pros: You can get the design and size that is best-suited for your space.
Cons: New premium lumber can be pricey. If you’re planning to build a potting station yourself soon, start looking for sources of old redwood or cedar now so that you’ll have materials on hand when you need them.
3. Hire a pro. If you would like a professionally built custom potting station or need to fit a potting bench into an unusual space in your yard, hire a carpenter or a contractor skilled at woodworking. Cost varies depending on the area where you live and the potting setup you’d like built. Expect to pay $500 to $1,500.
Pros: You get exactly the model you’d like that is best-suited to your needs and space, and you’ll avoid beginner’s mistakes by having a professional build it.
Cons: Most likely, this is going to be more expensive than purchasing an off-the-shelf potting bench or building one yourself.

Dagan Design & Construction, original photo on Houzz
Koffler designed and built this three-tier potting station out of long-lasting cedar treated with a weather-resistant coating of Superdeck stain. He customized the model with drawers for storing supplies, a side bin lined with plastic for storing soil, a lattice cover for shading seedlings and a galvanized steel backdrop, complete with hooks for tools.
The main work surface of the potting station extends 4 feet across and about 2 feet wide, covered by a lattice ceiling at about 6 feet tall, angled at 6.5 degrees. The main work surface is 3 feet off the ground — a comfortable height for working.
Dagan also added a hidden soil sifter to the design. There’s a removable cutout in the main workstation that’s lined with galvanized steel mesh. “The idea is to put a solid pot below and sift out soil,” Koffler says. Good-quality, sifted soil can then be stored in the bin until later use.
4. Repurpose an outdoor table. Alternatively, you can repurpose an old piece of furniture into a potting station — wooden desks, narrow tables and side tables can all work well. “A good height for working is important,” Acheff says. Look for pieces that have work surfaces about 3 feet off the ground. Also consider the materials of the furniture and how they’ll hold up to your climate. “Weather can do a number on indoor furniture,” Acheff says, and things like peeling paint can be harmful to the garden. If your furniture is not made for the outdoors or you’re otherwise unsure as to whether it will hold up to the weather, choose a site under a covered patio or in a garage.
Pros: It can be free or inexpensive if you can find a piece to recycle.
Cons: It may be limited to sheltered use only.

Theresa Fine, original photo on Houzz
Organization Tips
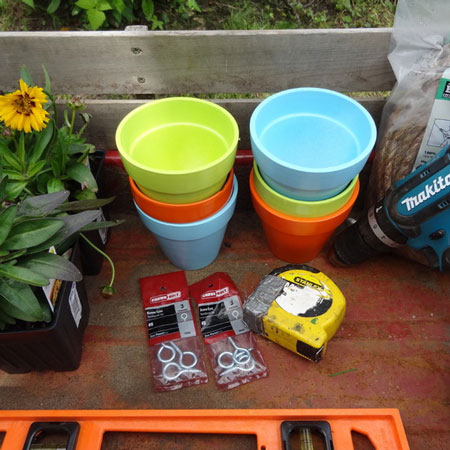
Store most-used items like garden shears where they’re easy to reach: hung from a hook, tucked in the top drawer or placed nose-down in an empty pot.
Gather together loose ends, such as plant labels, waterproof pens and reels of twine, in empty terra-cotta containers, glass Mason jars or bins. Group similar-use items together so that you’ll know where to find them. For example, put all drip-irrigation supplies in one bin.
Keep the workspace clear. Put away tools as you leave the garden or finish a project and sweep the work surface clear of potting soil.
Reserve the lower level for storing large pots and bags of soil amendments, such as chicken manure, bone meal or granite dust. Put the amendments and fertilizers in bins with sealed lids to keep them dry and out of reach of young children and animals.


